Sunday, April 29, 2012

Word Wall Linky

I'm linking up with Jen R. over at The Teachers' Cauldron and April over at Wolfelicious. Like Jen, I've also had problems with my Word Wall this year. 

It started off like this:
This was at the start of the year, before the kids even arrived. It took up the top half of my two whiteboards. I didn't like it. I really needed that space for other things so over the recent holidays I moved it to my windows (unlike Jen, I don't even have cabinets to put it on! I sure would love me  some cabinets or even a cupboard....). This is what it looks like now. 
On the back of each word wall letter is a students' name (you can kinda see the reflection through the paper. I've typed their name on paper, glued it to the coloured paper and laminated it). I had each student do a little self-portrait or other drawing when they came back from holidays and I attached it below their name facing out. As you walk towards the classroom, it's really nice to see the bright drawings! There is a missing piece of paper for Q but I've done that up for a new student who arrived before the holidays.

I like the position of the Word Wall now because all students can see it, which they couldn't before because of the glare on the whiteboards. Secondly, there is no glare now because the Word Wall is on the windows that caused it! I also like how each letter is separated, making words easy to find.

At my school, we have HF words that each grade is expected to learn. The first words that go up are always the names of my students, but after that I started reviewing Grade 1 words and then start on  Grade 2 words. We play games with the Word Wall to help us learn the words that are on there.  I use activities and games from this book the most.

I store my cards for each term in these nifty little expanding folders. They are only about 24cm x 15cm so are a good size for the word cards. I have one in a different colour for each term and I label each divider with a week number (Week 1, Week 2 etc). I got them at Big W for a couple of bucks each.


Do you have a Word Wall? Why not link up with Jen R. from The Teachers' Cauldron and April over at Wolfelicious . Visit both for lots of ideas.

Thursday, April 26, 2012

Daily 5 Write About Reading

Thanks everyone for your feedback on my Multiplication Madness freebie! I'm glad so many people could use it.

This is the first post in my Daily 5 series - doesn't that sound all fancy! Basically, I'm just going to take some photos and write about what I put in my Daily 5 tubs that I wrote about here (so not that fancy at all!)

You may have read before that I do Write About Reading instead of Work on Writing because I do writing and spelling separately from the Daily 5. When we do the Daily 5, I want my students to really focus on reading. I also wanted to have a set time when they worked on responding to texts we have read as a class and during guided reading. 

Each week, I have some type of response required from each of my 5 guided reading groups. Since I am doing running records this week (a school requirement that we do formal running records each term in order to set individualised reading goals), I am not taking guided reading groups so I have no photos. The responses vary depending on the text, the reading level, our class comprehension focus and the needs of the students in each group. For example, when we worked on retelling as a class focus, my lower groups did a simple BME by drawing pictures, others may do a story board with pictures and sentences and others may do a Story Map to identify the Characters, Setting, Problem and Solution along with the main events.

Most weeks I also have a reading response that I want the whole class to complete. We have been working very hard on our Stereotyping English unit. We've created Character Profiles and compared stereotypical characters to those found in texts such as The Paper Bag Princess and Emily and the Dragon.

So this week, after modelling and shared writing activities, I asked students to compare the dragon or Princess Elizabeth from The Paper Bag Princess to a stereotypical dragon or princess in a Venn diagram. Therefore in the tub this week, I have copies of the text, a Venn diagram sheet and clipboards so students can get comfy around the room (I find it funny that they'll even clip the sheet to the clipboard and go sit at their desk....)
 
They can also use the charts we've created on Prince Ronald from the same text to help them if needed. 
The Character Profile above is based on what we visualise when we think about "Princes".  Below is the same chart (Appearance, Qualities, Thoughts, Actions) for Prince Ronald from the book and the comparison Venn diagram.
 
I also had a question about something I mentioned in a previous post. I said we'd done a Hot Potato Tree Map.  A Hot Potato is just a variant of the Graffiti Wall. Basically I printed out a tree map for each group - one for Dragons, Princes, Princesses, Mum and Dads. The groups had about 2-3 minutes to write anything they could on the tree map. The tree map then rotates around the groups with each group reading through and adding more ideas until they get theirs back (I actually rotated the kids around, but both ways work).

I knew they'd be repeats and spelling mistakes so I collected them up after we went through them and wrote them on coloured paper to put up for future reference (handwriting is not my speciality!). 
I like to use Hot Potato strategy when I introduce a topic to find out what they already know or think (like above) or at the end of the unit to review a topic. You can do it for anything (not just Tree Maps).

Wednesday, April 25, 2012

50 page freebie - Multiplication Madness

I was ecstatic the other day when I noticed I reached 500 followers! To thank all of you, here is a freebie for multiplication.

It has 8 different activities and centres/centers for beginners. 


I hope it's a useful supplement to your existing materials. It's available on TpT.

If you download, I'd appreciate it if you left feedback!

It is ANZAC Day today. Our ANZAC Day ceremony at school was really good yesterday. The Senior Choir sang BEAUTIFULLY! Watching the videos, listening to the music, laying the wreaths and listening to current and ex-servicemen really brought it home to my littlies. Some Year 2s read a poem extremely well - they were getting compliments from everyone! My class was very solemn throughout - except for one who thought his shoes were WAY more interesting than what anyone else had to say....

Sunday, April 22, 2012

Freebies and Daily 5 CAFE pack

Since my post with photos of my Daily 5 and Guided Math set-up, I've had some email requests to share my files on TpT. Ask and ye shall receive! I've just added my Daily 5 posters, CAFE posters, Daily 5 I Can type charts, rotation/center labels and other bulletin board bits and pieces to Teachers Notebook. About 63 pages of bulletin board goodness!


The Math Set will be up soon. 

For those who like the polka-dotty theme, I have also done up time and boggle pieces. These are not my original ideas!

The clock numbers I first saw on Amy's blog, but  she got her inspiration from Kris at I {Heart} Teaching. I have these up in my room at the moment and they look great with all the other polky dottiness I have going on! I'll get a pic on Monday. 
I'm not sure who started the Boggle craze! There are soooo many great pins on Pinterest that I'm not sure who posted it first. So thank you all for the idea! Again, I just wanted some pieces with polka dots. 
You can grab both these freebies here in Google Docs.

I'm about to take my son to his footy match. There's an hour of training before the game (in addition to his 2 hours of training twice during the week). I really dislike games that are in the middle of the day - talk about a waste of time (my pet hate!). You can't really do anything beforehand, and the day is over once they finish! Of course, I don't mind doing it and I love watching him play, but I don't know how people with more than one child cope with all the running around after school and on weekends. My hat goes off to you!

Thursday, April 19, 2012

Guided Math

I hopped on tonight wanting to show you my Daily 5 tubs and realised I left my hard drive with the photos on it at school. So all your getting is how I organise my guided math groups because I took some photos today and I brought my camera home!

Like reading, I love meeting with math groups. I have four activities that we go through using the T.I.M.E. acronym.
T: Teacher's Choice. I work with ability based groups during this time. However, around report cards I might have to meet with individuals to do assessments, hence why I've called it Teacher's Choice - I might choose to have some kids do something else! I use manipulatives, the interactive whiteboard, songs etc here.

I: Independent Work - This is some type of activity to do with our current math concept. It isn't necessarily paper based (and we don't have a math textbook, but if you did, you could do it here). Students may be on the computers (Mathletics, SmartKiddies etc) or using some type of manipulative.

M: Math Facts - Partner math fact games, flash cards etc. Lots of the games I make I put in here. I also have lots of choices so students can choose a game that is right for them.

E: Essential Revision - An activity or game to revise a math concept from two or three weeks ago to keep it 'fresh'. I usually have a couple of options in this box. 

I have these clear tubs that I keep the activities in. I love them because they have lids (so nothing gets lost) and they stack in my bookshelf perfectly.

Here are our math tubs from this week. We have started learning multiplication. This is the first time students have learned about it.

This week in the Teacher's Choice box, I have bowls, cups and counters. I also have a checklist on a clipboard so I can check off what I notice the kids doing. It has all of the main learning objectives for the week. I record a number on the checklist that roughly aligns to: 
1: able to do independently
2: small amount of assistance/prompting
3: needed a lot of assistance and guidance
4: could not do

These checklists help me with signing the continua for the Year 2 Net and allows me to see what I need to work with certain kiddos on.
 
The first pic is what's inside. The second shows the laminated page that is on the lid of the box. I paperclip my lesson plan to it or write with a dry erase marker to remind me of what I'm doing (on the I, M and E boxes, I write what they can do in an I Can format or just plain dot points). The third pic shows how the clipboard fits inside. This was one of the reasons why I chose these boxes - I'm always misplacing my clipboards!
This week, I have placed copies of an activity from Amy Lemon's Multiplication Situations unit in the Independent Work tub along with some counters for students to make the arrays, a couple of Doubles games (the blue containers hold the counters/dice) and also some Addition/Subtraction games (to 10, to 20 and to 50 for different abiliteis) for the Math Facts tub. I also throw in some flash cards - the kids really like doing this with each other for some reason! For Essential Revision, I have put in a range of place value activities. I've got my place value dominoes and bingo in there and a freebie Place Value board game (to use with the bundling sticks) that I got online. I'll put in the link for it when I bring my hard drive home, hopefully the authors name is on the file somewhere (it wasn't.... but thank you to whoever made it!).

On a typical week, I do a a pre-assessment to determine my groups and a whole class lesson to introduce the concept on Monday. I also explain the activities for the tubs. 

On Tuesday and Wednesday, I do a mini-lesson and meet with 2 groups.  Each component is about 20 minutes. The four tubs are completed over these two days.

Thursday and Friday I'm flexible based on what I learned meeting with the groups. Most weeks, I repeat the Tues/Wed structure (but I swap out the activities- different independent work/computer, add some different math facts games, a different review concept) and on Friday, instead of the mini-lesson, I'll have a short post-assessment. The Essential Review tub is easy to swap over because I use materials and games from when we learned the concept - don't have to reteach, just review the instructions. Math Facts is also easy because I love making new math games and the kids love it when their favourite games make their way back in - they even love flash cards if I pop them in there! Other weeks, I might decide to do more whole class, or a craft, project, math investigation etc.and not follow the Tues/Wed structure.

But if you are new to math groups, you could even just do one group per day over four days or any other way that you can fit it in. 

I like this system because most weeks I get to meet in small groups with every student twice. The tubs are also easy to maintain and swap out. The Essential Review tub is my favourite because I dislike how there is often a big gap between the times we learn about a concept. I like the constant review that I incorporate each week. 

How do you teach math? Do you have a structure you love and that works for you? How do you store your games and materials?

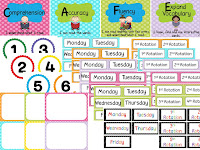
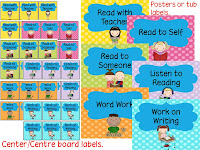
Edit: I've uploaded Posters, Tub/Rotation Labels and I-Can charts for T.I.M.E Math at my TpT store. 

Wednesday, April 18, 2012

Daily 5 Set Up

I love the Daily 5 and I love CAFE even more. I have struggled though, to keep the resources organised. When I rearranged my room over the holidays, implementing an organisational system for the D5 was a must. 

I made these charts earlier in the year as I introduced each Daily. It reminds students what they can do during each. I've since added a pic up the top in the middle - I hated that empty space! I wish I had room for these on the wall or a board, but I don't, so they are on the window.
I picked up some cute pink, blue and green tubs at a cheapie store, reduced the posters above, and attached them to the side. They hold the materials students need for each Daily. 
I keep these along the top of a bookshelf (not on top of each other. I just did that to fit them all in one photo). I'll do a separate post on what I keep in each tub over next week or so. 

I have also given my listening post area a little make over. The headphones go on the little shelf under the table. I've put my rocking chair there and a new little rug. The little table used to be grey, but my ex came to school with me and painted the two that I have blue, and some little shelves I have green. Much nicer than the grey! I keep a book on the stand that I am going to read that day. They love to come in and see what book I've put out.
The other little table is in our small group teaching area.
All of the essentials - pens, stapler, post-its, sticky tape, calculator. Ignore my pile of keys - that lanyard gets heavy I tell you! I use the pink trays for my daily materials. I now move the pink box in front of the frame and keep my planner there instead so I can always see what I'm doing. That comes in handy because I'm always writing myself little notes or wording for charts that I stick in it.
I also bought two little bookshelves. I keep my Missing Parts Tub on here (the blue one on the first shelf). The picture in the frame a mum made for me a couple of years ago. It has lots of inspirational words in the trees and a lovely message on the back. These shelve are kept at the front of the room near the IWB so I can always have things handy. Drawers that I keep coloured paper in are also there.

I'll be back soon with what I keep in each Daily 5 tub. How do you store your materials?

Tuesday, April 17, 2012

Stereotypes

We have just started our next 5-week unit on Stereotypes. I think it's going to be great! Here is a poster I made for our focus board. Click on it to grab it from Google Docs. 

We've done a picture sort, a Hot Potato activity with tree maps and we've read books to identify stereotypical and non-stereotypical characteristics in the images and actions of characters. A favourite activity today was when students had to draw and write about what they 'see' and 'think' when they hear a word like 'princess', 'witch', 'Queen', 'Prince' etc.

After a recommendation via email from a reader after my post on behaviour, I've looked into some of the Whole Brain Teaching strategies. I've started to implement Class/Yes. I felt a little uncomfortable doing it at first because it's not really my style. We'll see how it goes.

Over the holidays I went completely mad and rearranged my entire room! I changed where my VOICES and CAFE boards are, my desk, my small group area etc. I'll have pics soon. I'm totally in love with polka dots so they feature dominantly!

That's all for tonight. Toodles!

Monday, April 09, 2012

Story Elements Kite Freebie

I found these cute little ladybugs on Pinterst: 
 Click the pic to visit the site.

I wanted to use the idea when I get back to school but had to come up with an educational reason! We've been learning about story elements so I thought we could make a Story Elements Kite!

They are pretty simple to make. Just cut out the diamonds, each kite needs 2. Cut a slit along the dotted the line. Take the 2 diamonds and line up the slits and insert them into each other. Lay it flat and glue "Characters" onto the side. Open, 'turn' the 'page' of the kite, lay flat and glue down 'Setting'. Continue for Problem and Solution. 
This is the kite laid flat. 'Setting' label glued to the side. 
(How do you like my drawing skills!? Ha! Can you guess the story?)

Run a thin line of hot glue where the slits intersect to connect them together. Cut a piece of string and glue it in with the slits.

Cut a long strip of paper and glue to the bottom of the kite to be the streamer. Record the Title, Author and Illustrator of the story on the bows. Glue the bows on the streamer. 
I didn't have the glue or string at home, so here's my son holding the very quickly completed story elements kite! I figured I better do up something quickly, otherwise I'll forget about it by the time I head back to school.  I think they'd look heaps better with lots of colour and hanging from the roof. 

Grab the templates here in google docs. 

Also, I've recently added these products to TpT and TN and even better, everything is $2 or under!

 
Summer Writing Craftivity: TN and TptT 


 Skip Counting: TN and TpT            Multiplication/Division Fact Families: TN and TpT

We are now a week into our 2nd week off :( Goes too fast....Back to school on Monday.

Thursday, April 05, 2012

Buggy About Reading and Writing

Ooohh, I wish I was studying insects this term! For the past 2 years we have, but with the national curriculum we aren't learning about these fascinating creatures until (maybe) Term 3 (at least I'll be ahead for then....)

In the past, we have focused on insects in Term 2 because we read the text Ants for the Year 2 Net reading and writing validation tasks. So, I've been slowly slogging away at this pack during Term 1 only to find that we aren't doing it now :( Needless to say, I haven't been that motivated to finish it, but it's finally done and I can't even list it on TpT because they're having technical problems! HA! Always the way.

So what' a girl to do? How about you just leave a comment saying that you follow my blog and I'll give away a copy to a random follower tomorrow? Here's what you could get:

EDIT: It's now listed on TpT and Teachers Notebook. Click on the pictures to check out the 24 Reading and Writing Tasks that are included! It's 20% off at the moment.
 
 
This pack is filled with about 80 pages of before, during and after reading activities, writing scaffolds and graphic organisers/organizers. Just leave a comment and when I get home from seeing The Hunger Games tomorrow morning I'll draw a winner. Time for bed I think, it's almost midnight here...